)
Working as a DevOps at Scality, I’m exposed to Kubernetes clusters and CI/CD pipelines across the major clouds. My day-to-day tasks include maintaining Zenko and usually I’ve got large amounts of compute and storage resources at my disposal to test and deploy new infrastructure.
I love Kubernetes and would try to deploy a cluster on anything from a couple of toasters to AWS. Then one day I heard the announcement from Rancher about their micro-Kubernetes distribution called K3s (five less than K8s.)
I immediately was hit with an undeniable desire to set up a small, physically portable cluster and test the guts out of K3s. Being a long-time Raspberry Pi enthusiast, naturally, I saw this as an opportunity for a passion project.
The idea is simple but interesting. Take some Raspberry Pis and string them together as a Kubernetes cluster. Far from a unique idea, this has been done before; however, combined with this light-weight Kubernetes would allow for enough room to fit some workloads and you’ve got something new. I started to dream about Zenko at some remote-edge device where asynchronous replication to the cloud would thrive. I thought: “Let’s do this!”
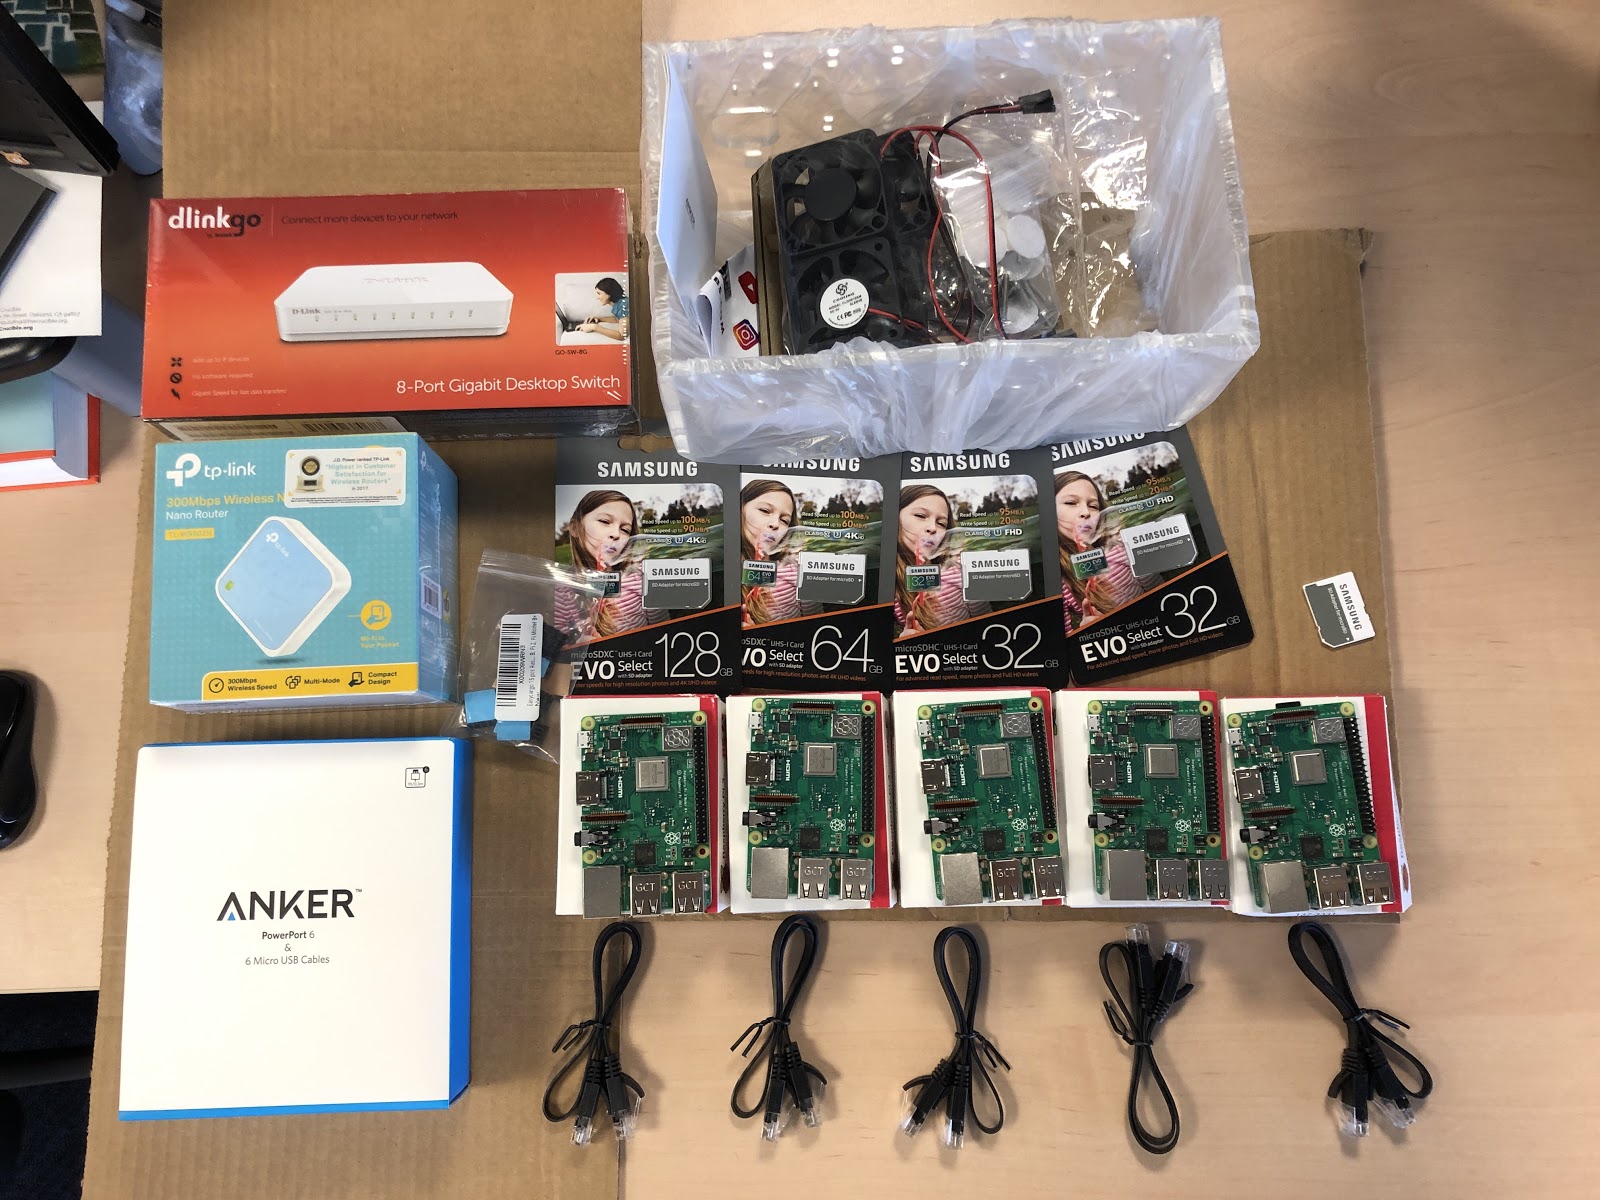
The shopping list for a tiny Kubernetes cluster
Here’s what you need:
- Five Raspberry Pis 3B+ (plus memory cards)
- C4 Labs “Cloudlet” 8-bay case
- Portable TP-link router
- Anker 6-port 60-watt USB charger
- 8-port switch
Operating system hustle
There are countless great guides on how to set up a Raspberry Pi with the various operating systems. On the initial setup, I started with just a basic Raspbian to test out and see if I could find or build ARM images for all the Zenko services. I was able to easily build key components – CloudServer and Backbeat images – with the ‘arm32v6/node’ Docker image as a base.
After that was successful, I decided to test out MongoDB, the core database we use for our metadata engine. Here’s where I hit my first problem: I discovered that MongoDB 3.x version only supports 64-bit operating systems. This is something I’ve taken for granted for so long that I forgot it’s an issue. Fortunately, Raspberry Pis 2 or newer use 64bit ARM chips but I still had to find a new OS since Raspbian only comes in the 32-bit flavor.
While there is no definitive list, most distributions have an ‘aarch64’ version that typically works with the newer Raspberry Pis. I settled on Fedora 29 mostly because they have a command-line interface tool to load the image onto the SD card, add an ssh-public-key, and resize the root filesystem to fill the SD card. These are all manual configurations that typically needs to be done after you first boot up your Pi. This also meant that I could set up all five of my Pis without hooking up a keyboard and monitor and immediately have headless servers running. (Note: you can download Fedora from here.)
So with all my Pis set up, it’s time to set up the Kubernetes cluster. While I’ve deployed countless clusters on virtual machines and bare-metal servers to the point that I feel like I could do it in my sleep, this time was completely unlike any I’ve done before. Thanks to the K3s installer, I had a cluster with four dedicated nodes and one master/node deployed under five minutes (not including my RPI setup time). Their bootstrap script allows you to whip this up in a jiffy.
It’s as easy as this:
# On the control server node
curl -sfL https://get.k3s.io | sh -

# Kubeconfig is written to /etc/rancher/k3s/k3s.yaml
k3s kubectl get node

# To setup an agent node run the below. NODE_TOKEN comes from /var/lib/rancher/k3s/server/node-token on the your server
curl -sfL https://get.k3s.io | K3S_URL=https://master-node-hostname:6443 K3S_TOKEN=XXX sh -
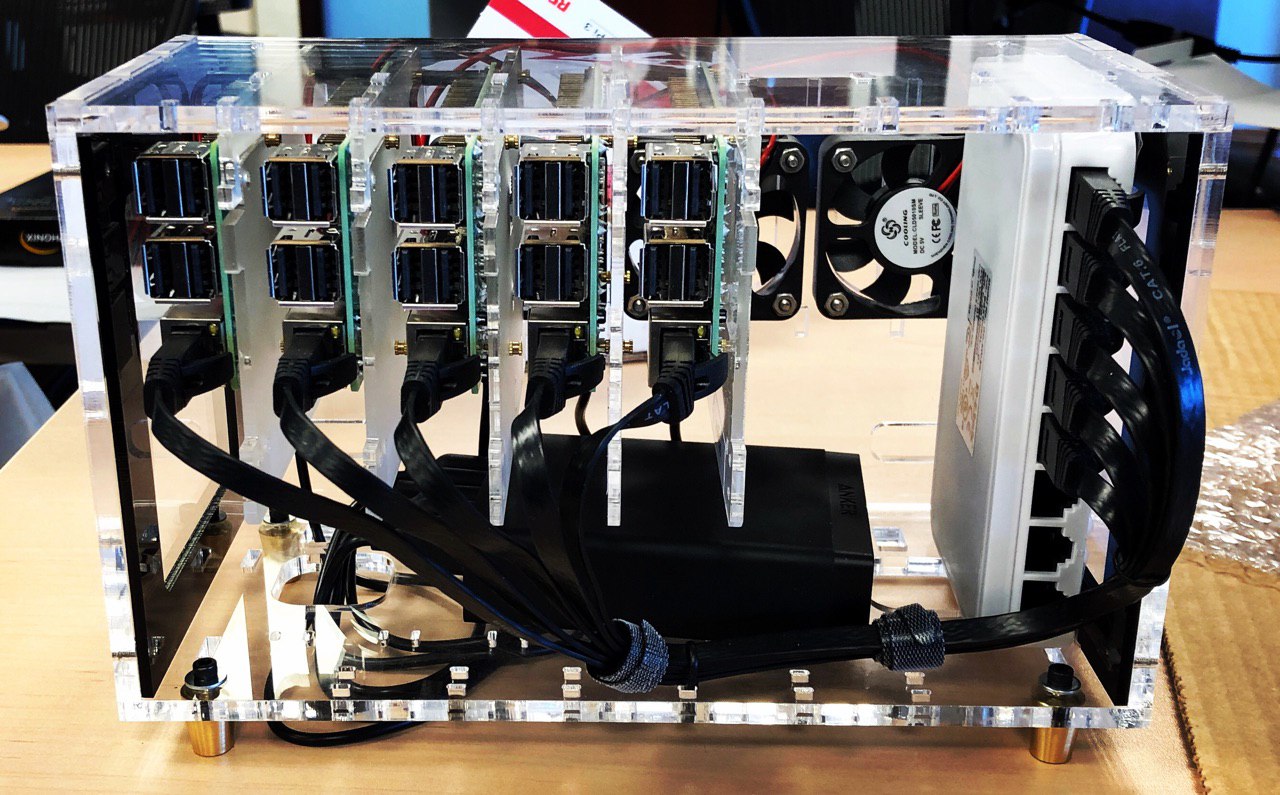
Putting Kubernetes on a mini-rack
With the 5-node Pi cluster operational it was time to set everything up in a portable format. The goals here were to only have a single power cable for everything and easily connect to WiFi wherever we take it. However, this also meant we didn’t want to go through the hassle of the manual set up and connecting each Raspberry Pi to the WiFi at every new location we brought it to. The solution was simple, make the network itself equally portable with a small switch and portable router.
The Cloudlet case from C4Labs is very thought out with wire management in mind and well put together with straightforward instructions for installing all the Raspberry Pis.
In our case, I wanted to be sure to leave room for the portable router, switch and power brick as well. Fortunately, and purely by accident, the length of the switch we ordered fit the exact internal height of the case allowing us to mount the switch vertically. This left us room underneath the Pis for the power brick and allowed us to mount the portable TP-link router in one of the remaining bays.
With all the fans mounted, Pis plugged in and wires managed we still had one very obvious issue — both the 8-port switch and the USB power brick needed their own plugs. Looking over the switch, I quickly noticed that it ran off 5v,which means it could easily run off USB. But I had already used up all six ports of the power brick for the five RPis and the portable router.
What’s next?
While this is it for now, the goal is to now put this diminutive cluster through some workloads for a gauge of performance and eventually turn the setup process into some simple Ansible playbooks to streamline to bootstrapping of multiple nodes.
Let me know what you think or ask me anything on the forum.
About the author
Salim Salaues is a dev-ops engineer at Scality who got his big break by doing a company hackathon. This post first appeared on Scality’s blog.
Superuser is always interested in open infrastructure tutorials, get in touch: editorATopenstack.org
Photo // CC BY NC
- Tasty hack: Make this Kubernetes cluster with five Raspberry Pis - June 19, 2019