)
DevOps evangelist and cloud native app developer Daniel Oh contributed this post.
In cloud-native world, many enterprise developers are considering better way to address non-functional micro-service capabilities such as API, tracing, resiliency, logging, pipeline, elasticity, invocation, authz & authn rather than implementation of business logic through Spring Boot, Vert.x, Node.js, and MicroProfile.
Fortunately, there’s a good solution to deal with this micro-services based service mesh with Istio. However developers still have to handle visual observablity for hundreds of micro-services in a network of services architecture.
A micro-service architecture fundamentally breaks up the monolith into many smaller pieces that fit together. Patterns to secure the communication between services like fault tolerance (via timeout, retry, circuit breaking, etc.) have come up as well as distributed tracing to be able to see where calls are going.
A service mesh can provide these services on a platform level and frees the app developers from those tasks. Routing decisions are done at the mesh level. Kiali works with Istio to visualise the service mesh topology, features like circuit breakers or request rates. Kiali also includes Jaeger Tracing to provide distributed tracing out of the box.
Getting started on OpenShift
Kiali is still in development. Snapshots releases are pushed on Dockerhub from the CI pipeline.
To deploy Kiali to your Istio-enabled OpenShift cluster you can run the following. Kiali currently requires Istio version 0.8.0 (see below if you have not yet installed Istio).
Preparation
First you need to grant the user that is installing Istio and Kiali the cluster-admin role. In the following case this will be the admin user:
oc login -u system:admin
oc adm policy add-cluster-role-to-user cluster-admin -z default adminThen log in as this admin user:
oc login -u admin -p admin
Now you can install Istio if needed. See https://istio.io/docs/setup/ for details.
Install Kiali
Then install Kiali:
curl https://raw.githubusercontent.com/kiali/kiali/master/deploy/openshift/kiali-configmap.yaml | \
   VERSION_LABEL=master envsubst | oc create -n istio-system -f -

curl https://raw.githubusercontent.com/kiali/kiali/master/deploy/openshift/kiali-secrets.yaml | \
   VERSION_LABEL=master envsubst | oc create -n istio-system -f -

curl https://raw.githubusercontent.com/kiali/kiali/master/deploy/openshift/kiali.yaml | \
   IMAGE_NAME=kiali/kiali \
   IMAGE_VERSION=latest \
   NAMESPACE=istio-system \
   VERSION_LABEL=master \
   VERBOSE_MODE=4 envsubst | oc create -n istio-system -f -
If you do not have envsubst installed, you can get it via the Gnu gettext package.
Once the above has completed and the Docker image has been pulled from Dockerhub, go to the OpenShift console, select the istio-system project and determine the base-URL of Kiali
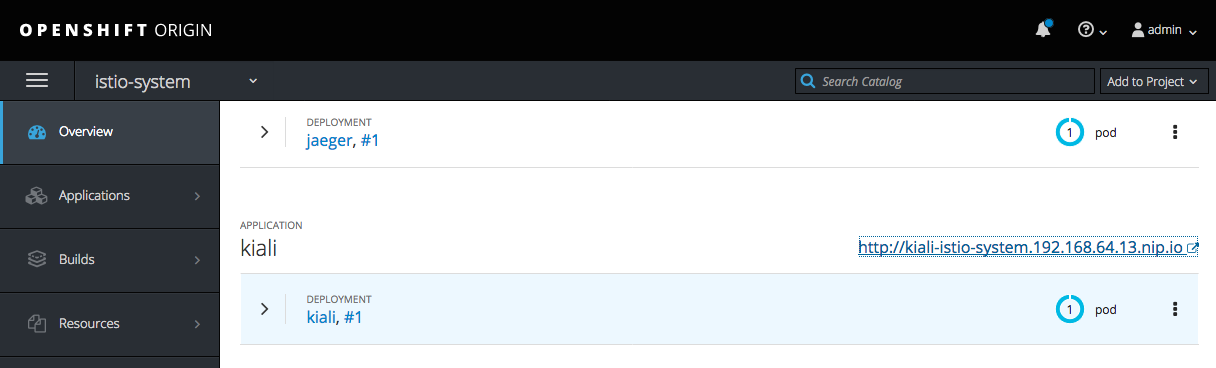
In this case it is http://kiali-istio-system.192.168.64.13.nip.io. In your case this could be a different IP.
You can also use the oc command to determine the base-url:
oc get route -n istio-system -l app=kiali
The Kiali UI
Log in to Kiali-UI as admin/admin.
For best results, you should have an example application like ‘bookinfo’ from the Istio examples deployed.
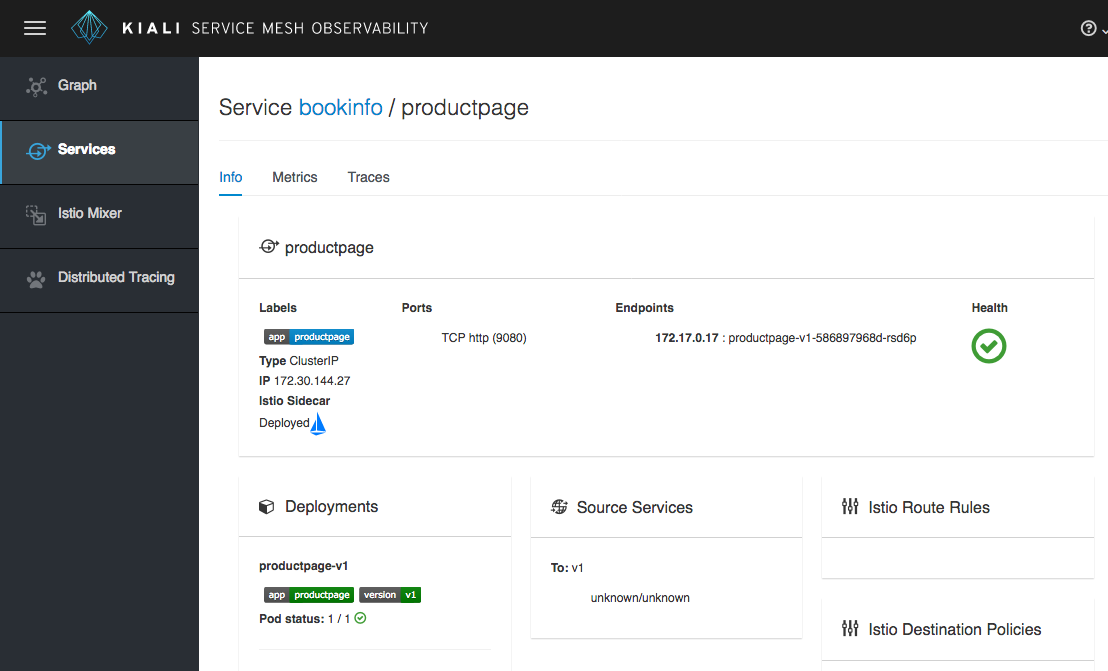
Detailed view of a single service
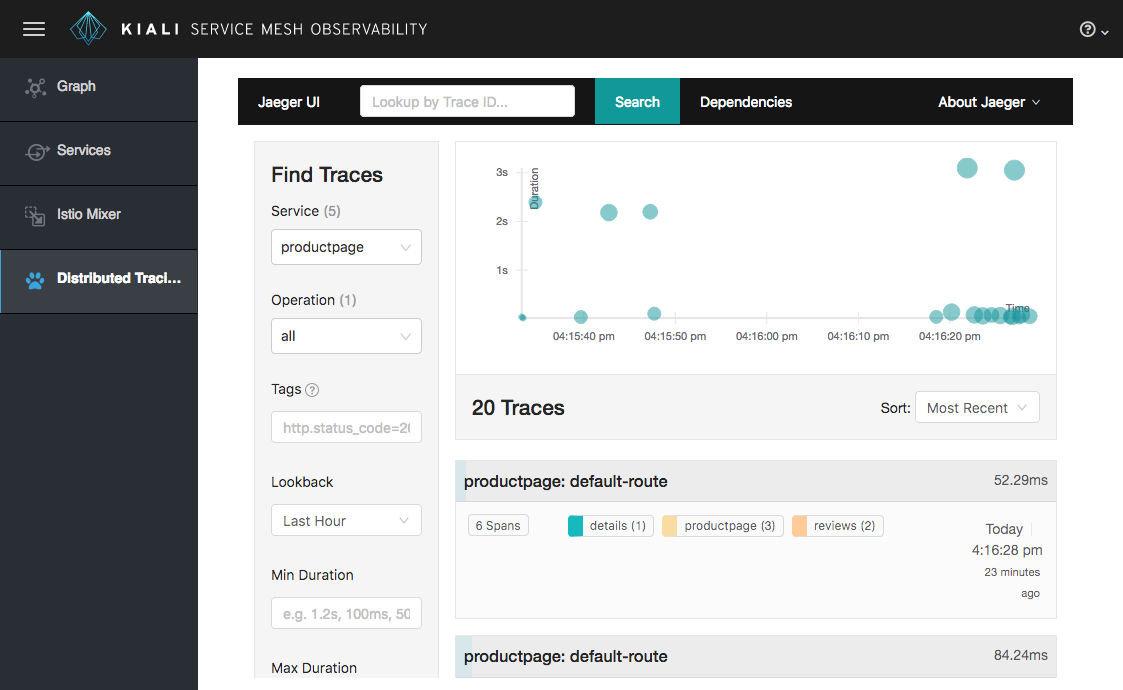
Distributed tracing view
 If you need more details about kiali project, all resources are here
This post first appeared on Linkedin. Superuser is always interested in open infra tutorials, get in touch: editorATopenstack.org
- Demystifying Confidential Containers with a Live Kata Containers Demo - July 13, 2023
- OpenInfra Summit Vancouver Recap: 50 things You Need to Know - June 16, 2023
- Congratulations to the 2023 Superuser Awards Winner: Bloomberg - June 13, 2023